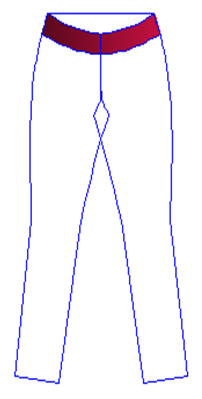
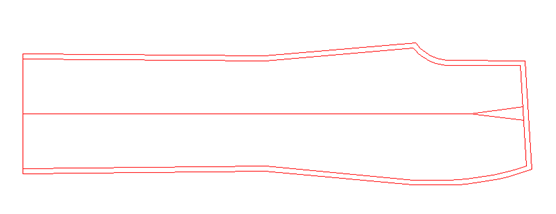
Trousers Pattern
The front part:
To make a pattern of the main trousers, we need to know the following measurements:
1) Half waistline.
2) Half hip circumference.
3) Trousers length.
4) Half circumference of knee circle.
5) Half circumference of leg opening circle.
Steps to implement the pattern (front part)
First:
1) Know trousers’ size, let’s say (38).
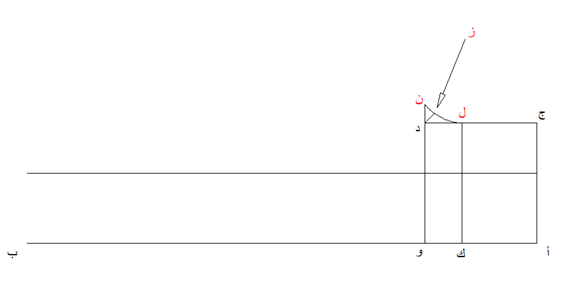
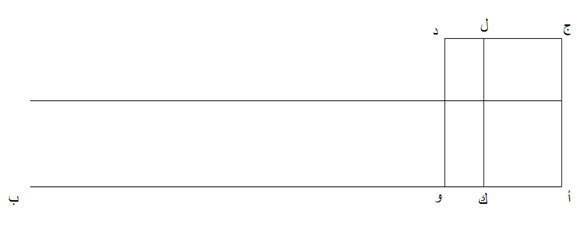
2) Draw a 105 cm horizontal straight line, name it (a, b). This line represents the side line of the trousers.
3) From point (a), draw a vertical extension equal to quarter the hip circumference, 25cm. At the end of the extension, mark point (c).
4) From (c) draw a horizontal extension that is parallel to line (a, b), with a length equal to (quarter hip circumference – 2 cm). This extension represents the span of saddle. Mark it with point (d).
5) From (d), draw an extension towards line (a, b) and mark point (f).
6) Mark the trousers’ pleat line. It should be parallel to line (a, b) and should be far to some distance (the distance between (a, c) ÷ 2 + 2). The result shall be taken from point (a) towards point (b) as indicated in the figure
.png)
Second:
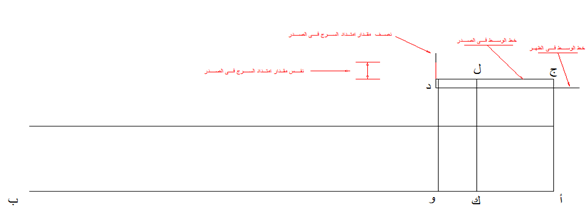
1) Produce hipline which is parallel to line (a, c) and should be far to a distance equal to (the distance between (c, d) ÷ 3). The result shall be taken from point (d) towards point (c). We shall name it using points (l, k).
2) Draw the front saddle circle by drawing 3 main points:
a) Draw an extension for saddle line (d, f) from (d) equal to (the distance between hipline and saddle line ÷ 2) as shown in the figure. We put point (n).
b) Fix the crossing point of the hipline (l, k) with the front center line (c,d) in point (l).
c) It is point (g) and is 3 cm away from the angle between lines (n, d) and (d, l).
3) Draw the saddle circle using the free hand. Connect between points (n, g, l) as indicated in the figure
Third:
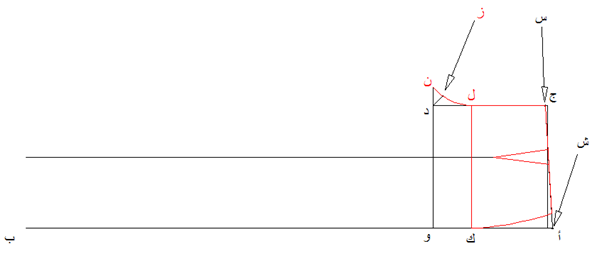
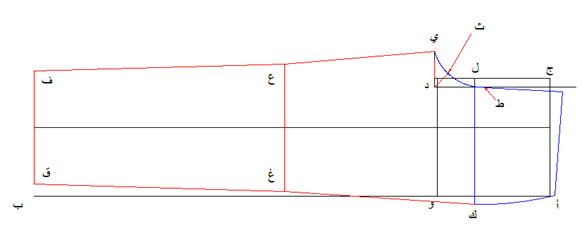
1) Draw the waistline by going 0.5 cm down from (c) on the front centerline. Mark point (s) and go 1 cm up from (a) and mark point (sh.). Then, connect between (s) and (sh).
2) Set the lengths of waistline and hipline to draw the external sideline, whereas:
a) Waistline (s, sh) = quarter waistline circumference + 3 cm (for the tuck). The center of the tuck shall be on the trousers pleat line.
b) Hipline length (l, k) = quarter hip circumference.
3) Connect between the two new points (a1, k1) using a curved line as indicated in the figure .
Fourth:
1) Set knee line 54 cm away from waistline. Both lines should be parallel. Length of knee line = (half knee circumference – 2 cm for the front part) for example (25 – 2). The center of knee line should be on the trousers pleat line, represented in points (g, gh).
2) Set the trouser’s leg opening line (trousers length line) by e.g. 24 cm. Its middle point should be at the end of trousers pleat line represented in points (i, q).
3) Connect the inner and external sidelines as shown in the figure.
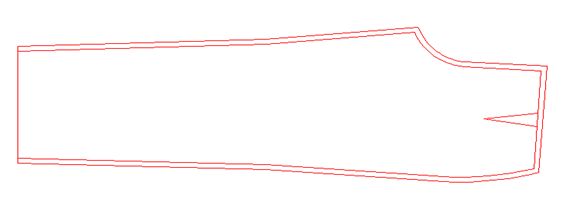
4) Add (1.1 cm) for the sewing stitches. See final figure for the front part.
Back part:
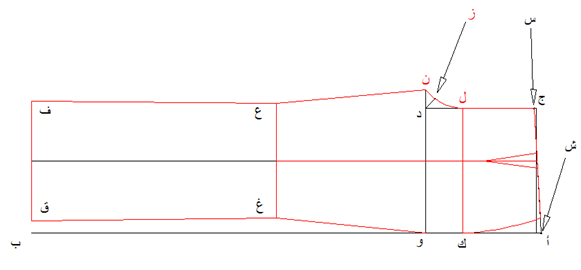
1) Perform the common steps between the front part and the back part, namely:
a) Draw sideline, 105 cm long (a, b).
b) Waistline (a, c).
c) Front centerline (c, d).
d) Saddle line (d, f).
e) Hipline (l, k).
f) Trousers pleat line.
2) Draw the back saddle circle after setting 3 main points and making the following amendments:
a) Draw an extension for the saddle line. It should be 0.5 cm under the saddle line in the front part (d, f). The extension exceeds the end of the front saddle by half of the saddle extension in the front part. Name it (j), i.e. end of saddle extension in the back part, as shown in the figure.
b) Put point (t) 2 cm away from the crossing point of the hipline with the centerline to the back towards the hipline.
c) Put point (th.) 4 cm away from the angle between each of the back saddle extension line and the back centerline.
3) Using the free hand, draw saddle circle by connecting between (j, th, t).
4) Draw an extension from (t) so as the end of extension is 2.5 cm up the line (c, a). The end of extension should also be 1 cm away from (d) extension line, as indicated in the figure.
5) We go 1 cm up from point (a) and connect this point with the end of the back centerline extension.
6) Set the lengths of each of:
a) Waistline = quarter waist circumference + 3 cm for the tuck. The tuck lies in the middle point of the waistline.
b) Set the length of hipline = quarter hip circumference.
7) Connect between points (a, k) with a curved line (the external sideline for the back part) as indicated in the figure.
8) Set knee line and the leg opening line provided that they are in the same position of the front part, whereas the length of knee line = 25 + 2 while the leg opening line is 24 cm.
9) Connect the inner and external sidelines as shown in the figure.
10) Add (1.1 cm) for the sewing stitches. See the final figure for the back part.